
安装 ElasticSearch
一、在服务器安装 ElasticSearch
1. ElasticSearch 压缩包
Download Elasticsearch 并上传到服务器并解压2. 启动
从5.0开始Elasticsearch不允许root账号启动,所以此处添加用户 es
创建用户组:
groupadd es创建用户,-g表示把es用户分配到es用户组中,-p表示给es设置密码为123456:
useradd es -g es -p 123456修改权限,更改elasticsearch文件夹以及内部文件的所属用户以及组为es,-R表示逐级(N层目录):
chown -R es:es /usr/local/elasticsearch切换es用户:
su es解压后运行:
Elasticsearch根目录/bin/elasticsearch

或者 「后台启动」

Elasticsearch根目录/bin/elasticsearch -d
然后执行命令访问测试:
curl http://localhost:9200/?pretty出现如下信息则启动成功:
{
  "name": "node-1",
  "cluster_name": "elasticsearch",
  "cluster_uuid": "FZaV2bvPQSm8T0AIz_8Pzw",
  "version": {
    "number": "7.2.0",
    "build_flavor": "default",
    "build_type": "tar",
    "build_hash": "508c38a",
    "build_date": "2019-06-20T15:54:18.811730Z",
    "build_snapshot": false,
    "lucene_version": "8.0.0",
    "minimum_wire_compatibility_version": "6.8.0",
    "minimum_index_compatibility_version": "6.0.0-beta1"
  },
  "tagline": "You Know, for Search"
}
3. 设置外网访问
修改配置文件:
vi config/elasticsearch.yml找到 network.host 注释删除,设置值为0.0.0.0:
network.host: 0.0.0.0 //注意冒号后有空格,且这一行开头不要有空格使用命令查询并杀死 elasticsearch 服务:
ps -ef | grep elastic

kill -9 [进程编号]
再次启动 elasticsearch
./elasticsearch //此次启动不要加上-d 启动易出错4. 启动报错
异常
[1]: max file descriptors [4096] for elasticsearch process is too low, increase to at least [65536]
切换root用户,编辑 limits.conf:
vi /etc/security/limits.conf

* soft nofile 65536
* hard nofile 65536
异常
[2]: max number of threads [3818] for user [es] is too low, increase to at least [4096]
最大线程个数太低。修改配置文件 /etc/security/limits.d/20-nproc.conf
vi /etc/security/limits.d/20-nproc.conf

*          soft    nproc     4096
*          hard    nproc     4096
root       soft    nproc     unlimited
异常
[3]: max virtual memory areas vm.max_map_count [65530] is too low, increase to at least [262144]
修改/etc/sysctl.conf文件
vi /etc/sysctl.conf

vm.max_map_count=655360
sysctl -p
异常
[4]:the default discovery settings are unsuitable for production use; at least one of [discovery.seed_hosts, discovery.seed_providers, cluster.initial_master_nodes] must be configured
修改配置文件 elasticsearch.yml
vi config/elasticsearch.yml

node.name: node-1 //放开注释,这一行开头不要有空格
cluster.initial_master_nodes: ["node-1"] //这一行开头不要有空格
http.cors.enabled: true  // 文档末尾新加,这一行开头不要有空格
http.cors.allow-origin: "*" // 文档末尾新加,这一行开头不要有空格
二、安装IK分词器
1. 下载对应版本的IK分词器
Download2. 安装
在elasticsearch根目录/plugins/创建文件夹ik 并解压
3. 使用示例
创建一个索引
curl -XPUT http:// localhost:9200 / index创建一个映射
curl -XPOST http://localhost:9200/index/_mapping -H 'Content-Type:application/json' -d '{
    "properties": {
        "content": {
            "type": "text",
            "analyzer": "ik_max_word",
            "search_analyzer": "ik_smart"
        }
    }
}'
插入文档
curl -XPOST http://localhost:9200/index/_create/1 -H 'Content-Type:application/json' -d '{"content":"美国留给伊拉克的是个烂摊子吗"}'

curl -XPOST http://localhost:9200/index/_create/2 -H 'Content-Type:application/json' -d '{"content":"公安部:各地校车将享最高路权"}'

curl -XPOST http://localhost:9200/index/_create/3 -H 'Content-Type:application/json' -d '{"content":"中韩渔警冲突调查:韩警平均每天扣1艘中国渔船"}'

curl -XPOST http://localhost:9200/index/_create/4 -H 'Content-Type:application/json' -d '{"content":"中国驻洛杉矶领事馆遭亚裔男子枪击 嫌犯已自首"}'
查询
curl -XPOST http://localhost:9200/index/_search  -H 'Content-Type:application/json' -d '{
      "query" : { "match" : { "content" : "中国" }},
      "highlight" : {
          "pre_tags" : ["<tag1>", "<tag2>"],
          "post_tags" : ["</tag1>", "</tag2>"],
          "fields" : {
              "content" : {}
          }
      }
  }'
返回:
{
  "took": 14,
  "timed_out": false,
  "_shards": {
      "total": 5,
      "successful": 5,
      "failed": 0
  },
  "hits": {
      "total": 2,
      "max_score": 2,
      "hits": [
          {
              "_index": "index",
              "_type": "fulltext",
              "_id": "4",
              "_score": 2,
              "_source": {
                  "content": "中国驻洛杉矶领事馆遭亚裔男子枪击 嫌犯已自首"
              },
              "highlight": {
                  "content": [
                      "<tag1>中国</tag1>驻洛杉矶领事馆遭亚裔男子枪击 嫌犯已自首 "
                  ]
              }
          },
          {
              "_index": "index",
              "_type": "fulltext",
              "_id": "3",
              "_score": 2,
              "_source": {
                  "content": "中韩渔警冲突调查:韩警平均每天扣1艘中国渔船"
              },
              "highlight": {
                  "content": [
                      "均每天扣1艘<tag1>中国</tag1>渔船 "
                  ]
              }
          }
      ]
  }
}
三、使用Window的免安装测试
1. 官网下载 ZIP
Download Elasticsearch2. 端口
9300 是 TCP通讯端口,集群间和 TCP 客户端都执行该端口
9200 是 Http协议端口,使用 RESTful
3. 注意
es 是基于java开发,必须搭好Java8及以上的环境,否则启动ES会失败。
四、Docker 安装
提示
如果不熟悉 docker 或者忘了命令 可以看我这篇 Docker容器
1. 安装ES
如果需要部署kibana容器,需要让es和kibana容器互联
docker network create es-net创建挂载目录并赋予权限
sudo mkdir /usr/local/es/
sudo chmod 777  /usr/local/es/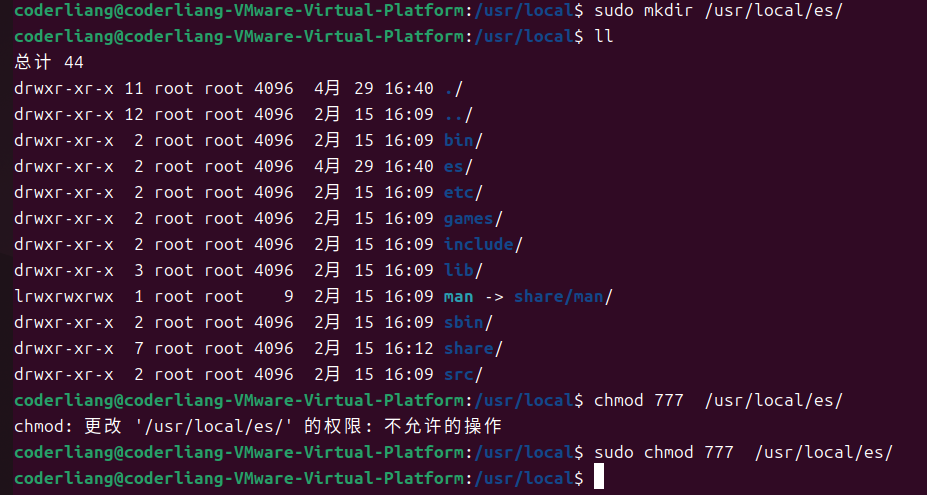
拉取镜像
docker pull elasticsearch:8.6.0启动镜像,不挂载外部配置文件
docker run -d \
--restart=always \
--name es \
--network es-net \
-p 9200:9200 \
-p 9300:9300 \
--privileged \
-e "discovery.type=single-node" \
-e "ES_JAVA_OPTS=-Xms512m -Xmx512m" \
elasticsearch:8.6.0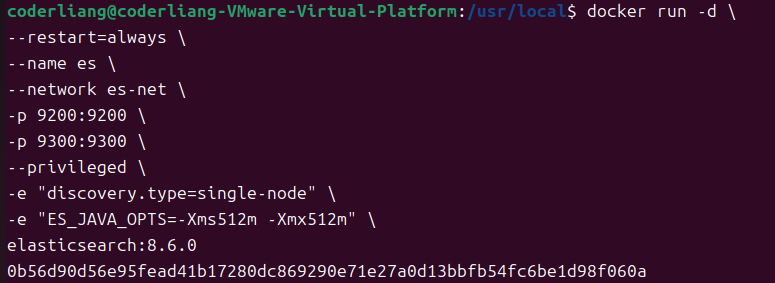
查看启动日志有没有报错
docker logs -f es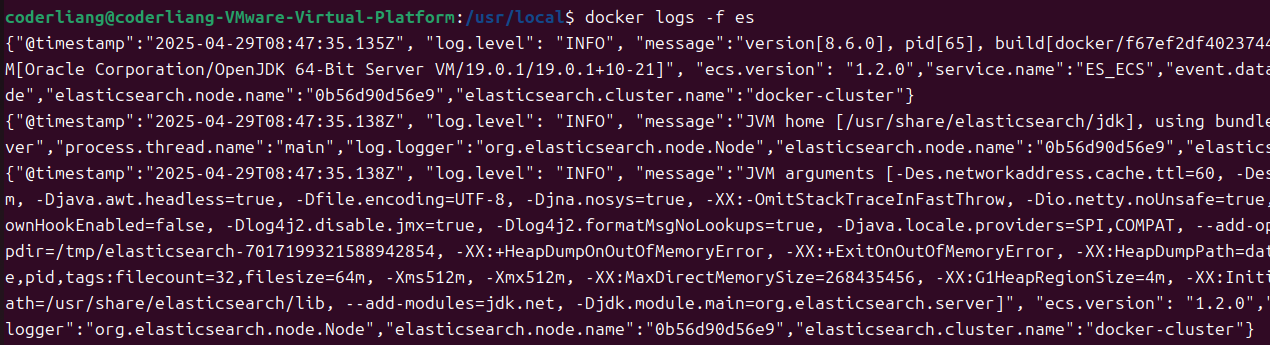
查看docker容器启动成功没
docker ps -a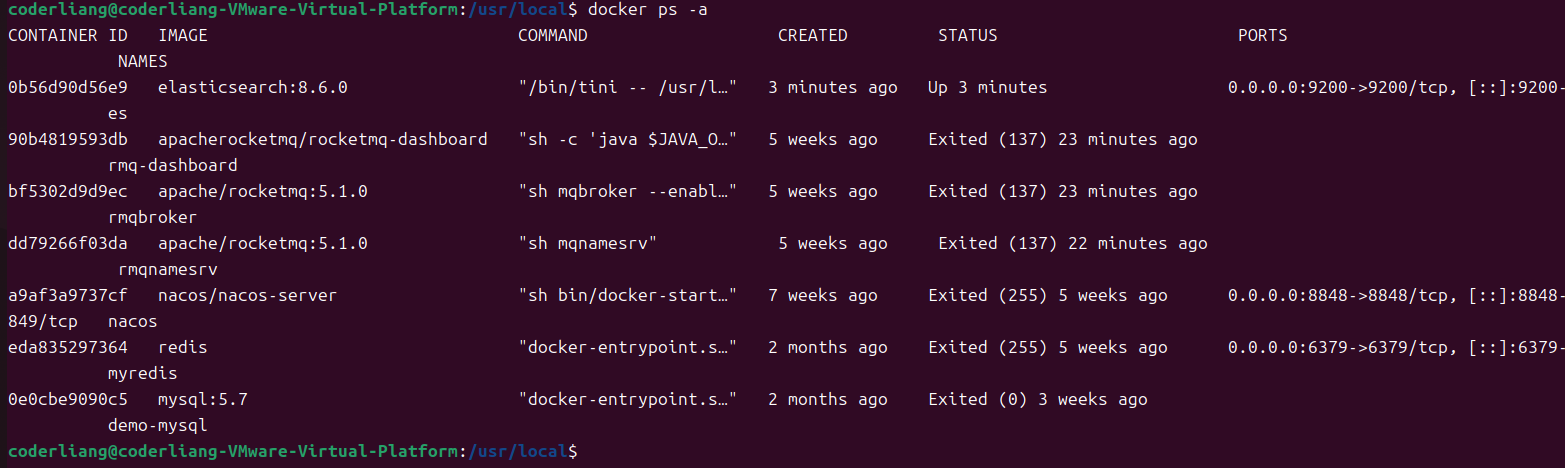
将容器内的文件复制出来
docker cp es:/usr/share/elasticsearch/data /usr/local/es

docker cp es:/usr/share/elasticsearch/plugins /usr/local/es

docker cp es:/usr/share/elasticsearch/config /usr/local/es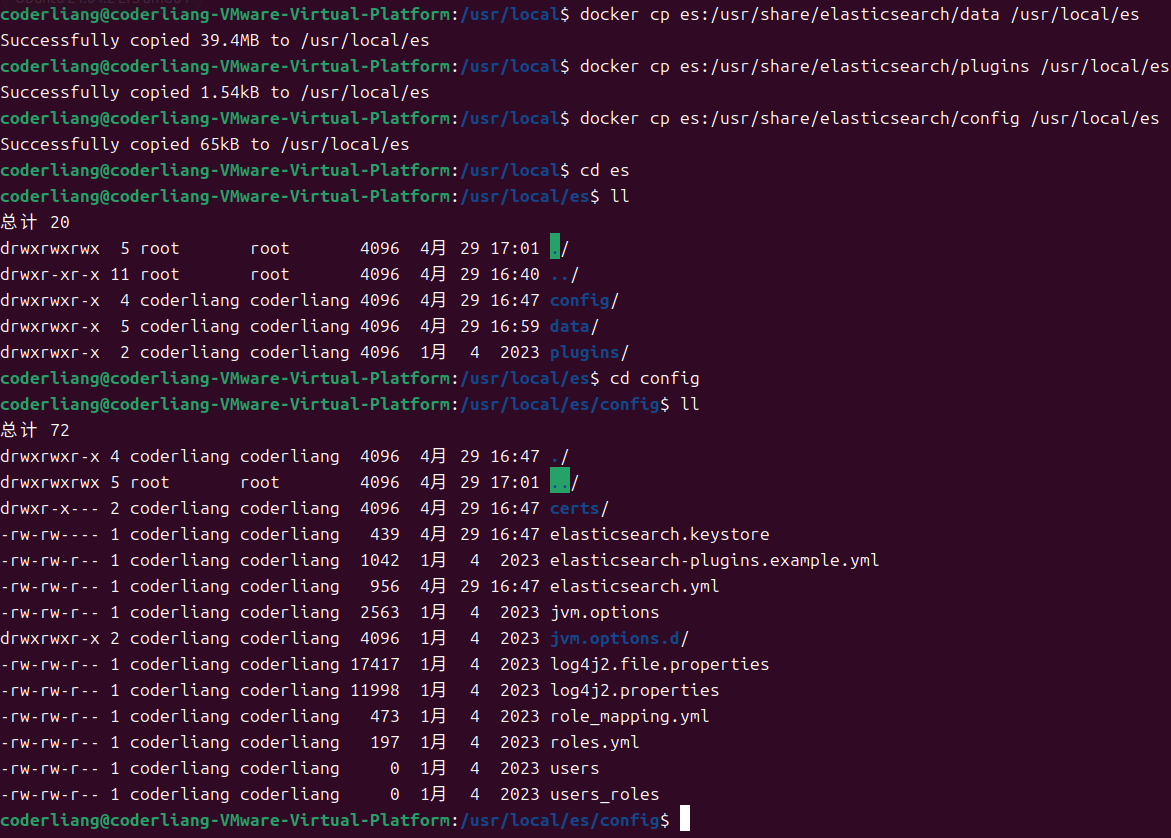
停止容器
docker stop es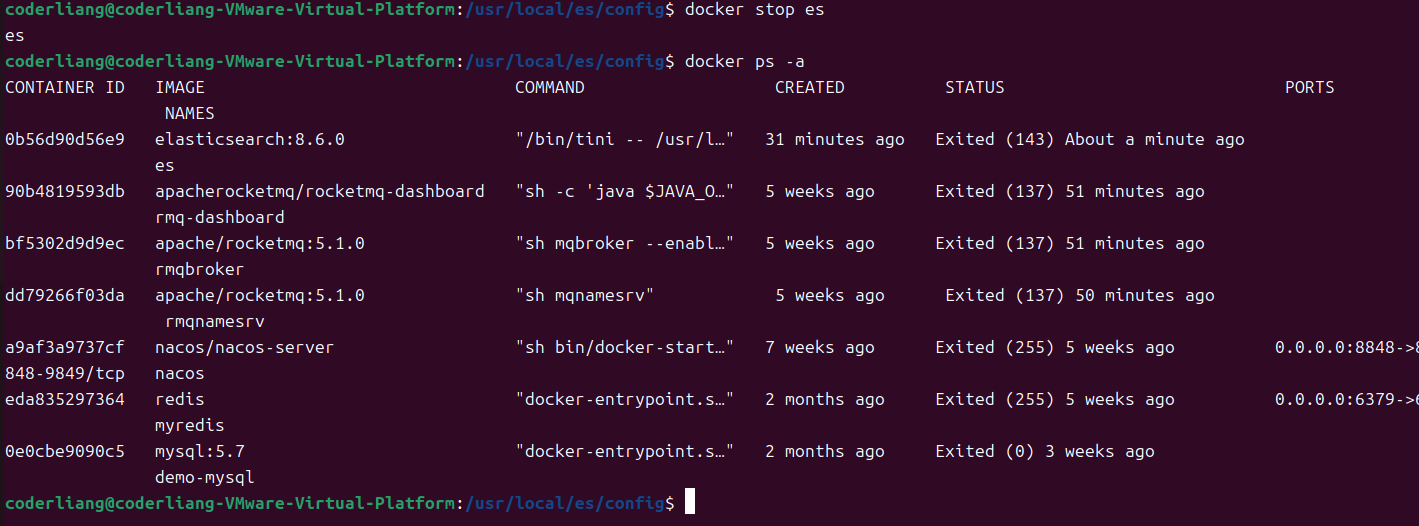
删除掉刚才的容器
docker rm es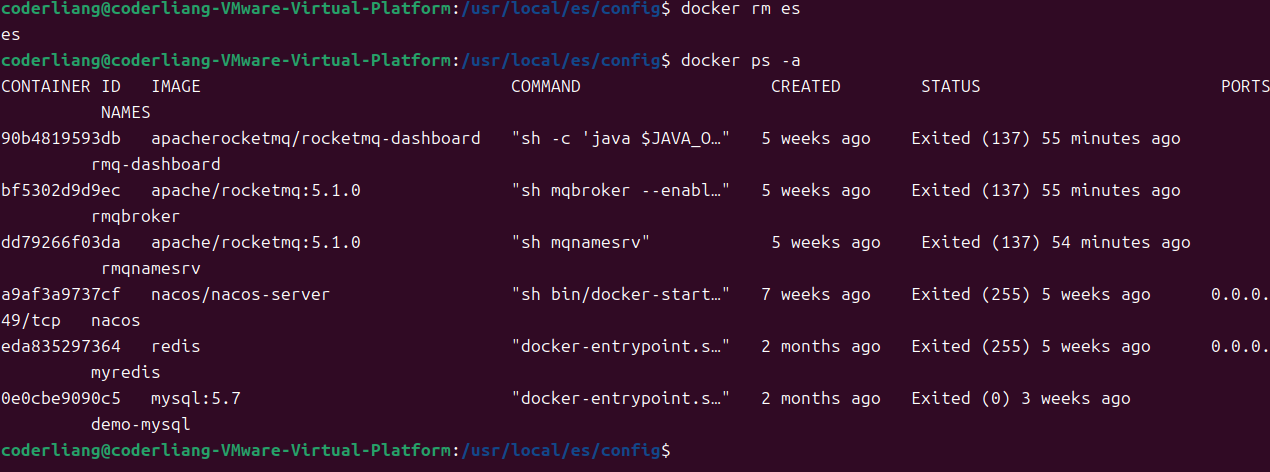
进到刚才拷贝出来的配置文件目录
cd /usr/local/es/config修改文件 elasticsearch.yml
sudo vim elasticsearch.yml按
i键,进入编辑模式修改文件后,esc退出编辑,再按住shift键+两下z键,保存并退出修改的内容如下:

重新启动,关联外部配置文件
docker run -d \
--restart=always \
--name es \
--network es-net \
-p 9200:9200 \
-p 9300:9300 \
--privileged \
-v /usr/local/es/data:/usr/share/elasticsearch/data \
-v /usr/local/es/plugins:/usr/share/elasticsearch/plugins \
-v /usr/local/es/config:/usr/share/elasticsearch/config \
-e "discovery.type=single-node" \
-e "ES_JAVA_OPTS=-Xms512m -Xmx512m" \
elasticsearch:8.6.0
浏览器访问
http://IP:9200/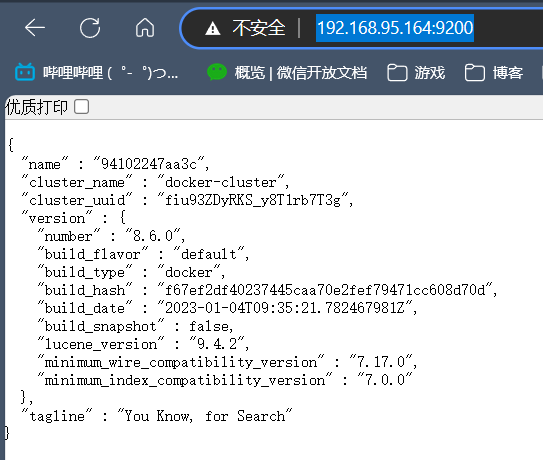
2. 安装IK分词器
以root用户进入容器。注意root用户!
docker exec -u 0 -it elasticsearch /bin/bash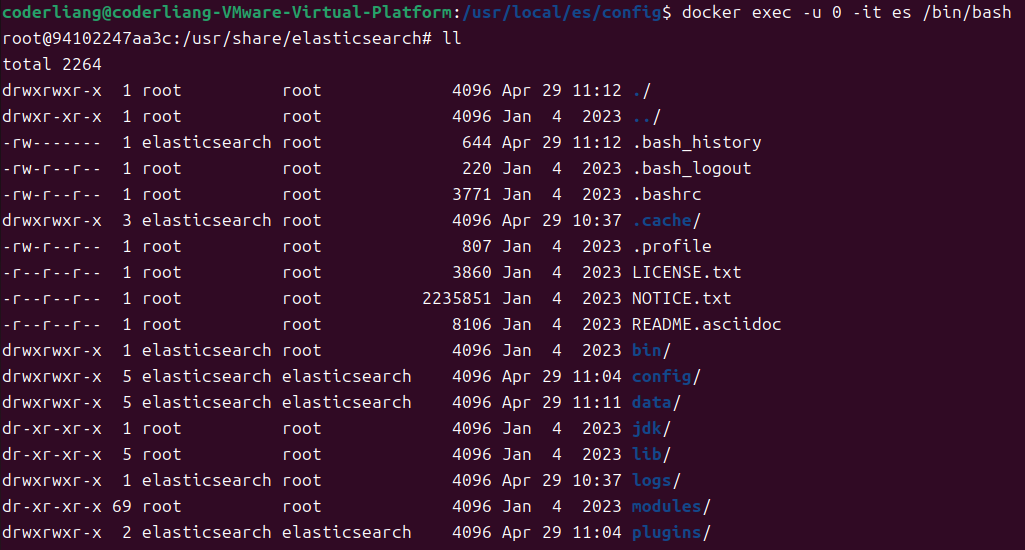
注意进入后的路径
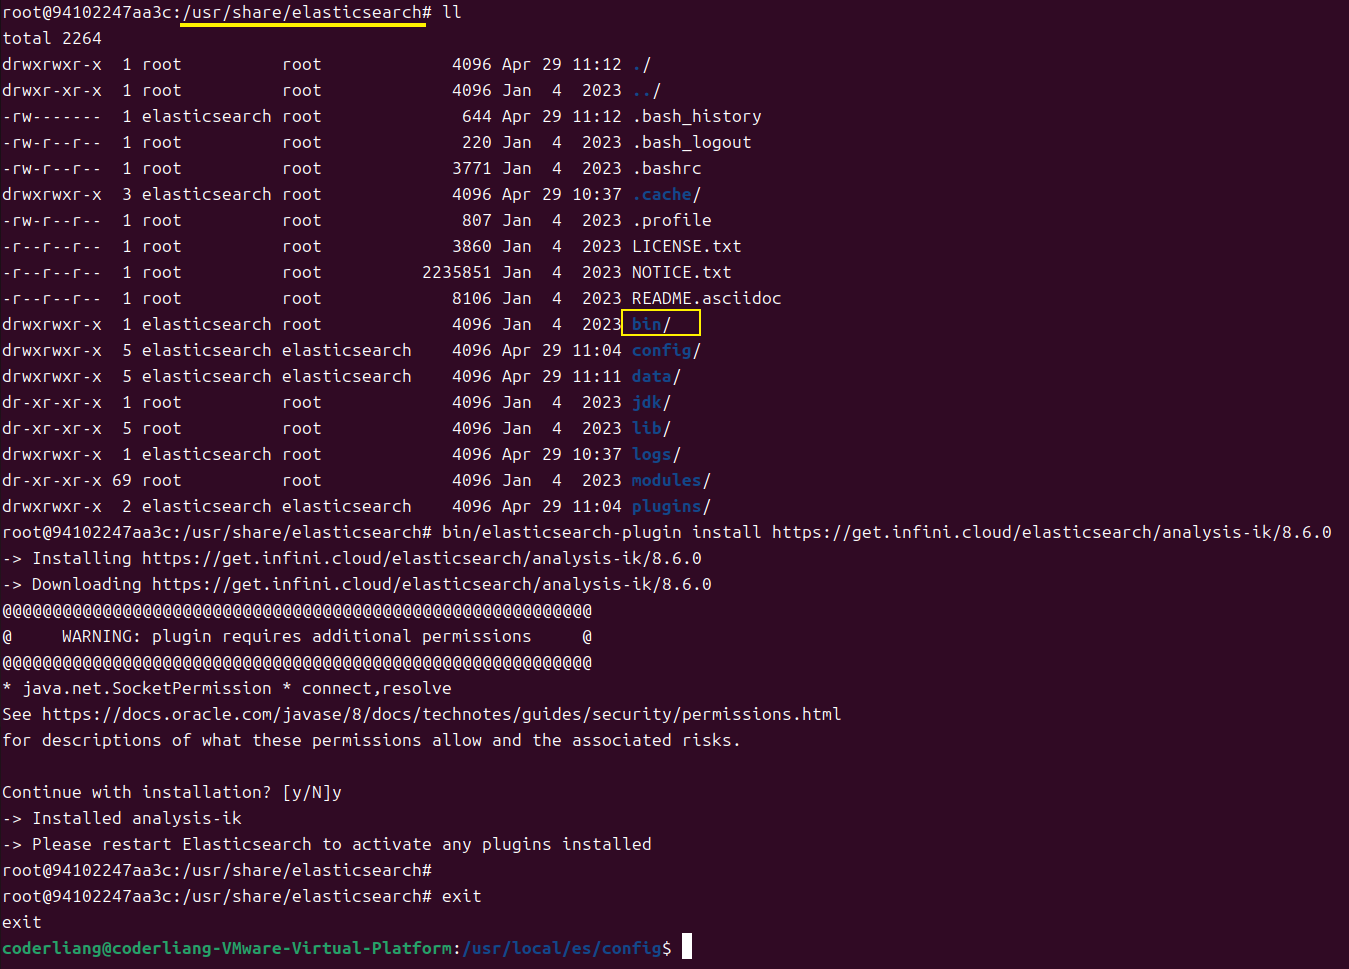
下载安装包
bin/elasticsearch-plugin install https://get.infini.cloud/elasticsearch/analysis-ik/8.6.0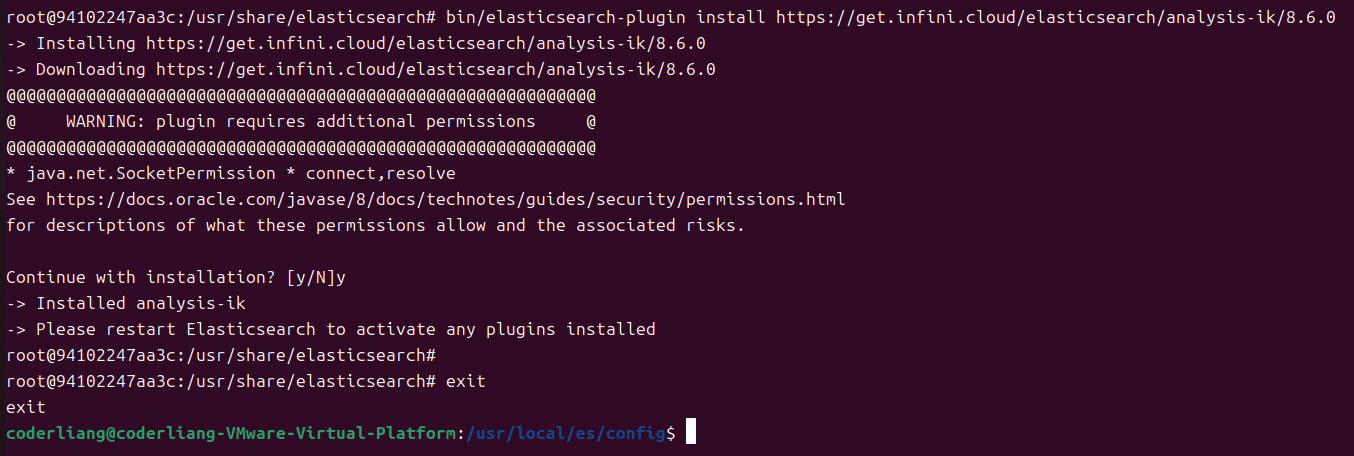
重启
docker restart elasticsearch
3. 安装Kibana
Kibana可以给我们提供一个elasticsearch的可视化界面
拉取镜像 注意版本 要与ES一致
docker pull kibana:8.6.0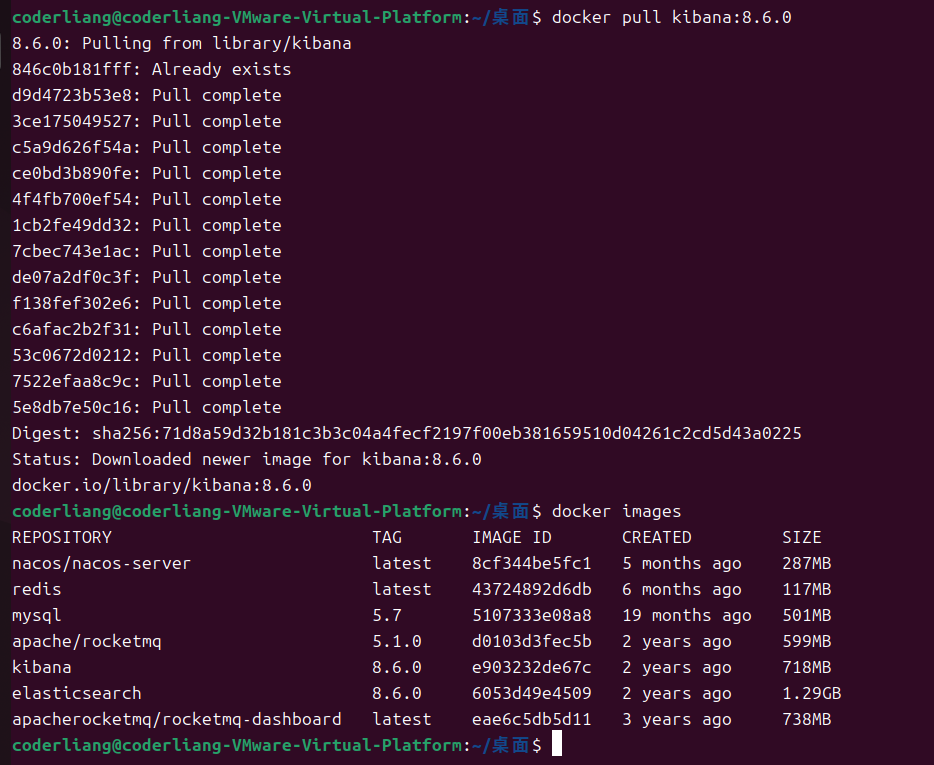
启动
docker run -d \
--restart=always \
--name kibana \
--network es-net \
-p 5601:5601 \
--privileged \
-e ELASTICSEARCH_HOSTS=http://es:9200 \
kibana:8.6.0
访问
http://你的IP:5601
提示
我们后面使用 kibana 的 Dev Tools 来学习 ES
